Get a Free BJJ Course — Limited Time Only!
 
Systematically Attacking From Top Pins: Mount by Gordon Ryan — ByteByU

Systematically Attacking From Top Pins: Mount by Gordon Ryan

Pin them down and finish strong — your mount game, perfected.
Foundations of BJJ cover
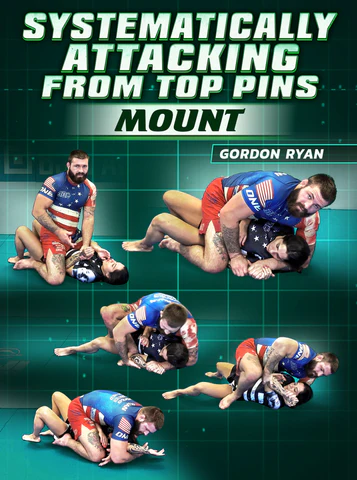
  • Learn How To Break Down Your Opponents From The Mount With This Total Technical Guide To Controlling & Submitting Systematically With Dynamic Pinning Lessons From The Best No-Gi Grappler On Earth, 3-Time ADCC Champion Gordon “The King” Ryan
  • Control the mount against all your opponent’s escapes and begin to isolate limbs away from the body for strangles and joint locks
  • Maintain the mount against escapes with Gordon’s advice on shutting down their defenses and taking advantage with counters
  • Gordon teaches you every detail of his system across 8-volumes so that you can start attacking with more technique and confidence
  • Watch Gordon spar in live rounds from mount, then break down his techniques so you can see the system in action
  • This top pinning system is the same one that Gordon has used to dominate at the elite levels of no-gi grappling, with his coach John Danaher’s revolutionary concepts & dilemmas
  • Know more. Win more!
Buy Now: $349 $30

Course Content

Volume 1

8 Lessons
Intro
0:00 – 3:48
Overview
3:48 – 5:19
Side Control – Isolating the Near Arm
5:19 – 14:34
Shin Mount
14:34 – 18:11
Mounting from a Top Head and Arm
18:11 – 26:06
Countering a Bridge
26:06 – 32:20
Mounting with Double Unders and Over Unders
32:20 – 40:45
Mounting with Reverse Underhook
40:45 +

Volume 2

10 Lessons
Mount Maintenance Intro
0:00 – 3:10
Hips Up vs Hips Down
3:10 – 7:49
Feet Positions
7:49 – 17:31
Pinning Arms vs Passing Arms
17:31 – 19:42
Goal Setting
19:42 – 23:35
Recovering from 3/4 Mount – Intro
23:35 – 29:56
Remounting with Near Side Underhook
29:56 – 34:36
Remounting with Double Underhooks
34:36 – 40:27
Remounting with Far Side Underhook
40:27 – 47:35
Remounting with Cross Face Only
47:35 +

Volume 3

7 Lessons
Countering a Push & Bridge
0:00 – 6:00
Lifting Elbows
6:00 – 10:19
Cross Wrist Gripping
10:19 – 17:34
Using a Cross Wrist to Prevent the Knee-Elbow Escape
17:34 – 21:34
Cross Wrist to Back Head & Arm
21:34 – 28:50
Taking the Back
28:50 – 32:37
Back Head & Arm to Front Triangle
32:37 +

Volume 4

10 Lessons
Seated Head & Arm Intro
0:00 – 4:04
Enter Back Triangle
4:04 – 8:44
5 Submissions
8:44 – 19:13
Seated Head & Arm to Side Triangle
19:13 – 27:00
Seated Head and Arm to Front Triangle
27:00 – 29:46
Seated Head & Arm to 3/4 Juji
29:46 – 33:17
Armbar Grip Break 1
33:17 – 42:09
Armbar Grip Break 2
42:09 – 46:45
Armbar Grip Break 3
46:45 – 50:46
Armbar Triangle Dilemma
50:46 +

Volume 5

6 Lessons
Cross Wrist to Underhook
0:00 – 7:22
Enter Katagatame
7:22 – 12:06
Finishing Mechanics
12:06 – 19:28
Opponent Defends Katagatame – Chase the Back
19:28 – 22:53
Enter Double Underhooks
22:53 – 28:00
Countering a Bridge
28:00 +

Volume 6

9 Lessons
Moving to High Mount
0:00 – 3:24
Moving to S Mount
3:24 – 7:41
Separating the Hands
7:41 – 13:29
Entering Mounted Triangle
13:29 – 20:26
Enter Back Triangle
20:26 – 24:03
How I Triangled Josh Barnett
24:03 – 31:21
Rebooting the System
31:21 – 33:23
Dismounting to Side Control
33:23 – 36:01
Outro
36:01 +

Volume 7

5 Lessons
Rolling Drew
0:00 – 5:00
Rolling Shawn
5:00 – 11:47
Rolling Alex
11:47 – 17:11
Rolling Christos
17:11 – 24:27
Rolling Placido
24:27 +

Volume 8

5 Lessons
Rolling Commentary Drew
0:00 – 9:53
Rolling Commentary Shawn
9:53 – 20:41
Rolling Commentary Alex
20:41 – 29:57
Rolling Commentary Christos
29:57 – 43:46
Rolling Commentary Placido
43:46 +

????️ Systematically Attacking From Top Pins: Mount

A high-pressure control and finishing system from the mount position—built to dismantle defenses and chain submissions with structure and precision.

???? Course Overview

Gordon Ryan reveals how to dominate from mount by applying relentless pressure, positional traps, and calculated submission chains. Rather than holding the mount passively, you’ll learn how to systematically break down frames, force reactions, and flow into armbars, chokes, and back takes with surgical control.

???? What You’ll Learn

  • Mount Control Blueprint
    Essential mount variations: low mount, high mount, S-mount, cross-face pin
    Weight distribution & chest-to-hip pressure mechanics
    Hip isolation & hand-fighting to shut down escapes
  • Submission Chains & Attacks
    Armbars from S-mount & high mount
    Americana & kimura via cross-face & arm traps
    Mounted triangles & sneaky chokes under pressure
    Transition attacks: mount → back exposure
  • Positional Transitions
    Seamless switching between mount types
    Reacting to bridges & elbow-knee escapes
    Transitioning to knee-on-belly or back takes
  • Live Application & Drills
    Partner drills for mount under resistance
    Positional sparring on reaction & submission timing
    Coaching cues for pressure application & setups

???? Who This Course Is For

Perfect for grapplers who:
• Want to turn mount into a finishing stronghold
• Prefer pressure-based top control with structure
• Train gi & no-gi and seek unified top-pin strategies
• Need drillable, reaction-ready transitions from control to submission

✅ Key Benefits

  • ✔ Control That Leads to Submissions
    Mount becomes a launchpad, not a resting point.
  • ✔ System-Based Transitions
    Move between pins with confidence—no reset needed.
  • ✔ Resistance-Proven Techniques
    Built to function against fully resisting opponents.
  • ✔ Structured for Real Rolling
    Designed for partner drilling, sparring, and high-level progression.
Made on
Tilda