Get a Free BJJ Course — Limited Time Only!
 
Systematically Attacking The Legs by Gordon Ryan — ByteByU

Systematically Attacking The Legs by Gordon Ryan

Unlock heel-hook success with Gordon “The King” Ryan’s 8-volume masterclass!
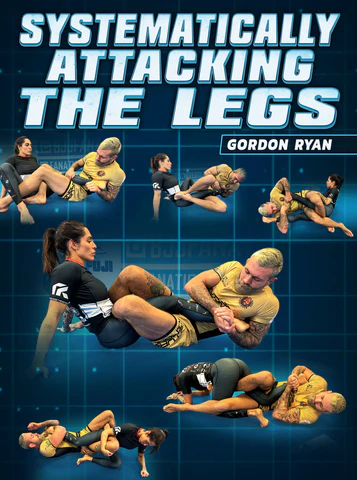
Systematically Attacking The Legs cover
  • Unlock the secrets to heel-hook success from Gordon “The King” Ryan
  • 8-volume masterclass on systematically attacking the lower body
  • Leg entanglements: irimi ashi, cross ashi, 50/50, outside ashi, and more
  • Step-by-step systems to stay safe and apply powerful leg submissions
  • Inside & outside heel-hook mechanics and defenses
  • Real gym rolling footage with detailed breakdowns
  • Know more. Win more.
Buy Now: $349 $30

Course Content

Volume 1

23 Lessons
Intro To Leg Locks
0:00 – 3:41
Overview
3:41 – 6:41
Theory
6:41 – 8:37
Importance Of Inside & Outside Heelhooks
8:37 – 11:25
Battle Of Inside Positions
11:25 – 15:05
Irimi & Outside Ashi Strategy
15:05 – 19:32
Cross & Inside Ashi Strategy
19:32 – 24:20
50/50 Strategy
24:20 – 27:54
Mutual Ashi Strategy
27:54 – 29:53
General Escape Directions
29:53 – 34:39
Double Trouble
34:39 – 37:32
Following A Leg
37:32 – 39:24
Switching Legs
39:24 – 41:22
Basic Drills
41:22 – 50:58
Achilles Lock Drill
50:58 – 54:50
Cowboy Drill
54:50 – 58:07
Achilles Lock Concepts
58:07 – 1:02:37
Knee Bar Concepts
1:02:37 – 1:07:34
Toe Hold Concepts
1:07:34 – 1:11:17
Heel Hook Concepts
1:11:17 +

Volume 2

20 Lessons
Intro To Irimi Ashi Garami
0:00 – 1:53
Setting An Irimi Ashi Garami
1:53 – 5:21
Stress Test
5:21 – 10:28
Basic Achilles Lock
10:28 – 14:18
Countering A Basic Extraction
14:18 – 16:48
Counter Forward Pressure With Ashi & Elbow
16:48 – 19:18
Counter Forward Pressure With Post Ashi
19:18 – 22:05
Counter Forward Pressure With Belly-Down Achilles
22:05 – 25:27
Switching To Butterfly Ashi
25:27 – 29:36
Butterfly Ashi To Other Entanglements
29:36 – 34:49
Achilles Heel Hook Dilemma
34:49 – 38:22
Finishing Mechanics
38:22 – 45:32
Stress Test
45:32 – 46:54
Counter Heel Slip With High Hands
46:54 – 48:28
Counter Heel Slip With Roll Through
48:28 – 52:34
Switching To Outside Ashi
52:34 – 54:34
Single Roll Theory
54:34 – 59:41
Counter A Post Knee
59:41 – 1:02:22
Figure 4 Switch If Refuse To Roll
1:02:22 – 1:05:13
Outside Ashi Breaking Mechanics
1:05:13 +

Volume 3

19 Lessons
Intro To Outside Ashi
0:00 – 0:56
Irimi vs Outside Ashi Garami
0:56 – 5:04
Countering A High Leg
5:04 – 8:07
Counter High Leg With Wrist-to-Wrist Toehold
8:07 – 10:28
Controlling Outside Ashi & Denying Back Exposure
10:28 – 13:21
Controlling Hips By Leg Scissoring
13:21 – 15:45
Cross Shin Hip Control
15:45 – 18:29
Forward Roll
18:29 – 21:27
Tiny Jacket Rant
21:27 – 23:39
Belly-Down Heel Exposure
23:39 – 28:42
Post Ashi Heel Exposure
28:42 – 33:09
Post Feet Heel Exposure
33:09 – 35:24
Cross Shin Heel Exposure
35:24 – 39:12
Stress Test
39:12 – 42:32
Counter Heel Slip With Roll
42:32 – 44:48
Heel Exposure On Kneeling Opponent
44:48 – 47:23
Reiterating Achilles/Heel Hook Dilemma
47:23 – 48:32
Achilles: Irimi vs Outside Ashi
48:32 – 50:54
Heel/Knee Bar
55:05 +

Volume 4

15 Lessons
Intro To Toe Holds
0:00 – 1:55
Belly-Down Exposure
1:55 – 6:31
Belly-Up Exposure
6:31 – 9:50
Belly-Down Finishing Mechanics
9:50 – 11:59
Belly-Up Finishing Mechanics
11:59 – 15:59
Toe Hold To Heel Hook
15:59 – 18:47
Recapturing A Knee
18:47 – 24:00
Calf Slice Switch
24:00 – 29:38
Intro To Top Ushiro
29:38 – 31:12
Moving To Top Ushiro
31:12 – 34:57
Heel Hook & Toe Hold Exposure
34:57 – 37:33
Double Trouble To Counter Locked Legs
37:33 – 40:26
Toe Hold Knee Bar Dilemma
40:26 – 45:54
Spinning The Leg
45:54 +

Volume 5

29 Lessons
Intro To Cross Ashi
0:00 – 1:45
Leg Positions
1:45 – 5:28
Main Issues With Cross Ashi
5:28 – 8:59
Basic Theory
8:59 – 12:07
Basic Leg Pummeling
12:07 – 15:47
Figure 4 Achilles
15:47 – 18:17
Reverse Figure 4 Achilles
18:17 – 21:20
Achilles To Heel Hook
21:20 – 25:29
Leg Lace
25:29 – 28:36
Leg Lace To Heel Hook
28:36 – 31:29
Passing A Leg – 2-on-1 Ankle
31:29 – 34:16
Half Dracula To Heel Hook
34:16 – 37:36
Passing A Leg – Double Dracula
37:36 – 40:16
Exposing Both Heels
40:16 – 42:14
Counter Primary Escape With Stretch Ashi
42:14 – 45:47
Catching Heel Without Secondary Leg
45:47 – 48:56
Catching Heel From Shoelace Ashi
48:56 – 53:02
Heisting Dilemma From Shoelace Ashi
53:02 – 58:51
Using Achilles To Mitigate Back Exposure
58:51 – 1:03:28
Counter Forced Double Inversion
1:03:28 – 1:07:23
Achilles Grip To Backside 50/50
1:07:23 – 1:11:30
When All Fails, Center Chest
1:11:30 – 1:15:43
Forward Shift To Heel Hook
1:15:43 – 1:20:38
Far Hip Ashi To Stop A Roll
1:20:38 – 1:22:52
Transfer To Inside Ashi
1:22:52 – 1:25:57
Following A Roll
1:25:57 +
Volume 6

17 Lessons
Intro To 50/50
0:00 – 1:58
Attack Until You’re Defending
1:58 – 4:47
Inside Knee Position
4:47 – 6:46
Separating A Semi Sankaku
6:46 – 10:24
Toehold/Separation Dilemma
10:24 – 14:09
Toehold/Heelhook Dilemma
14:09 – 15:41
Countering The Hand Fight
15:41 – 22:33
Cross Waist 50/50
22:33 – 3:35
Sweep/Inversion Dilemma vs Kneeling Opponent
3:35 – 6:57
Backside 50/50 Transitions
6:57 – 40:55
Following A Roll
40:55 – 44:54
Intro To Mutual Ashi
44:54 – 46:54
Going Last
46:54 – 49:47
Rolling Through
49:47 – 54:20
Far Hip Ashi
54:20 – 57:50
Gripping
57:50 – 1:10:58
Outro
1:10:58 +

Volume 7

5 Rolling Sessions
Rolling – Placido
0:00 – 5:08
Rolling – Nathalia
5:08 – 10:42
Rolling – Placido
10:42 – 15:46
Rolling – Nathalia
15:46 – 20:47
Rolling – Placido
20:47 +

Volume 8

5 Commentary Sessions
Rolling Commentary – Placido
0:00 – 13:31
Rolling Commentary – Nathalia
13:31 – 28:08
Rolling Commentary – Placido
28:08 – 35:29
Rolling Commentary – Nathalia
35:29 – 43:03
Rolling Commentary – Placido
43:03 +

What Will You Learn?

Now is your chance to unlock the secrets to heel-hook success, as Gordon “The King” Ryan shows you how anyone can become a leg locker with these systems and techniques he’s perfected throughout his rise in submission grappling.

Gordon breaks down every major leg-locking position—irimi ashi, cross ashi, outside ashi, 50/50, and more—and teaches you step-by-step how to apply, break, and finish safely and effectively. You’ll see live rolling footage and get detailed explanations of what he’s doing and why.

This 8-volume series also includes drills used by Gordon and his team, plus insights into heel hook mechanics, knee bar, toe hold, Achilles lock, and defensive strategies. Whether you’re a beginner or a seasoned competitor, you’ll add powerful, systematic leg-locking tools to your arsenal.

So, What Exactly Do You Get?

PART 1

  • Intro To Leg Locks
  • Overview & Theory
  • Inside vs Outside Heel Hook Importance
  • Irimi & Cross Ashi Strategies
  • 50/50 & Mutual Ashi Strategies
  • Escape Directions & Drills
  • Achilles, Knee Bar, Toe Hold & Heel Hook Concepts

PART 2

  • Irimi Ashi Garami Breakdown
  • Achilles Lock Mechanics & Dilemmas
  • Countering Pressure & Heel Slip
  • Switching Entanglements & Roll Theories
  • Outside Ashi Breaking Mechanics

PART 3

  • Outside Ashi Control & Pressure
  • Scissoring, Cross Shin & Roll Drills
  • Heel Exposure & Defensive Counters
  • Stress Tests & Dilemmas

PART 4

  • Toe Hold Exposure & Finishing Mechanics
  • Knee Recaptures & Calf Slice Transitions
  • Top Ushiro Entry & Double Trouble Counters

PART 5

  • Cross Ashi Theory & Leg Lace Attacks
  • Figure 4 Achilles & Variations
  • Leg Passes & Dracula Transitions
  • Stretches, Shoelace & Heisting Dilemmas

PART 6

  • 50/50 Attack & Defense Concepts
  • Separation & Sweep/Inversion Dilemmas
  • Mutual Ashi Flow & Roll Drills

PART 7

  • Live Rolling Sessions (Placido, Nathalia)

PART 8

  • Rolling Commentary & Technique Breakdown
Made on
Tilda